

Google Stadia was supposed to be the next evolution of cloud gaming with mass adoption expected (at least they thought that) when it launched in 2019. Not only did it offer some of the lowest latency game streaming I've ever experienced, it launched with games running at 60 FPS that just wasn't possible for PlayStation 4 Pro or Xbox One X. But it was not meant to be as Google began closing down its game studios in 2021. This would eventually lead to the announcement last year that Stadia would be joining its many other Google projects in the grave.
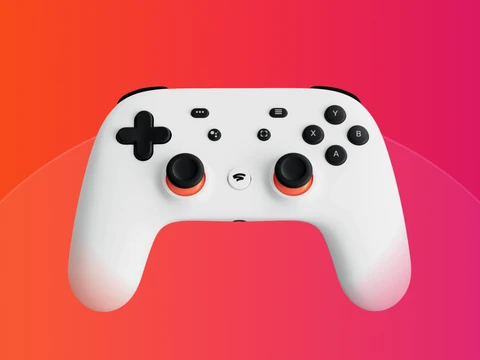
One of the biggest complaints regarding the service involves the Google Stadia controller that locked out Bluetooth support even though it was built in. When news of Stadia's imminent demise became clear, many began asking for Google to unlock this feature while it was still possible and the software engineers were still around. Well, Google heard the outcry and released a website that could do just that.
So that's what we're going to be doing in this guide and I will also show you how to play your Steam games using the controller. You will need a PC with Chrome version 108 or newer, I used the latest version of Microsoft Edge and didn't have any problems. Also, make sure your Google Stadia controller is fully charged before you follow along.
Fast Travel
Step 1: Visit Google Stadia Website
Once you visit the Google Stadia Bluetooth website, if you scroll down you will notice the option to check if your controller already has the Bluetooth update which I recommend you do if you purchased the controller second-hand. My controller hasn't been updated so let's click the Switch to Bluetooth mode button.
Step 2: Plug In Controller
Next, you will be asked to plug in the controller. You can use any USB Type C cable but it will not let you continue unless the controller has been charged for at least 30 minutes.
Select the Allow Chrome to verify button. A window will show the connected controllers, select the one that says Stadia Controller and click the Connect button. Chrome will verify the controller and you can select the Next step button at the bottom right.
Step 3: Unlock Controller
This step requires you to unlock your controller so it can download updates. Unplug the controller and make sure the Stadia button is not lit up. If it is lit up, you can hold it until the controller powers off. Next, hold the button with three dots that I like to call the select button while you plug the controller back in.
Then press this combination of buttons at the same time, the select button, the button with four dots right below the select button, A, and Y buttons. Once you've inputted this combination, click the Next step button.
Step 4: Download Updates
Select the Allow Chrome to download button and another window will show the controller if you did the previous step correctly. My controller showed up as SP Blank RT Family, select it and click the Connect button. Chrome will then download the latest firmware for your controller. When it completes the download, click the Next step button.
Step 5: Install Bluetooth Mode
Again select the Allow Chrome to download button and on the popup window pick the controller and click the Connect button. This time my controller showed up as a USB Composite Device. Now all you need to do is wait while the latest firmware is installed.
Step 6: Pair Controller
After the controller has been updated you can now connect it to any device with Bluetooth support. To put a Google Stadia controller in pair mode, all you have to do is hold the Stadia and Y button until it lights up orange. Now let's reconnect our controller wirelessly via Bluetooth.
Right-click the Bluetooth icon at the bottom right of our Taskbar. Select Add a Bluetooth Device, click the Add device button, click the Bluetooth button, and wait while it scans. Your Stadia controller should appear if it's in pairing mode, select it and it should say Connected. You can verify it's working by checking out Gamepad-Tester.
Step 7: Steam Input
Now that it's connected you will need some type of software that can map it to an Xbox controller or else you will notice no game natively supports the Stadia controller. Through Steam Input we can make our Stadia controller emulate the Xbox controller which makes it usable in games launched through Steam. Open up Steam, right-click any of your games, and select Properties. You can also get there from the cog icon on the games page.
On the next window select Controller from the menu list on the left. We're setting a Controller override for only this game by setting it to Enable Steam Input. Now launch your game and you will notice that your Google Stadia controller is treated like a Xbox controller. It's really that easy to get it working for individual games but what if we want all of our Steam games to work with a Stadia controller?
Well, that is easy too, under View at the top of your Steam window, select Settings. On the Settings window select Controller on the left side menu. Then select the General Controller Settings button at the top. You should get a window with a title that says Controller Settings at the top. After checking the Generic Gamepad Configuration Support option and exiting this window, all of the games you launch in Steam will now work with your Google Stadia controller.
Google Stadia's servers might have shut down but after following this guide, hopefully, we're keeping the controllers from heading to landfills. If you found this guide useful let us know in the comments. Remember to subscribe and follow us on YouTube and Twitter to stay in the loop.
Add Thoughts
Advert